jan - mar 2022 | DFMA, CAD, CAM, injection molding


"Ball Boy", as sketched by an elementary school student. He's a "cool dude".

Initial sketch of toy design

Initial toy design, considering parts and assembly
After considering assembly and the number of parts required, we opted to simplify Ball Boy, and swapped the park for snow. As such, our final toy would consist of three parts designed in NX: two halves of the basketball and the snowboard.

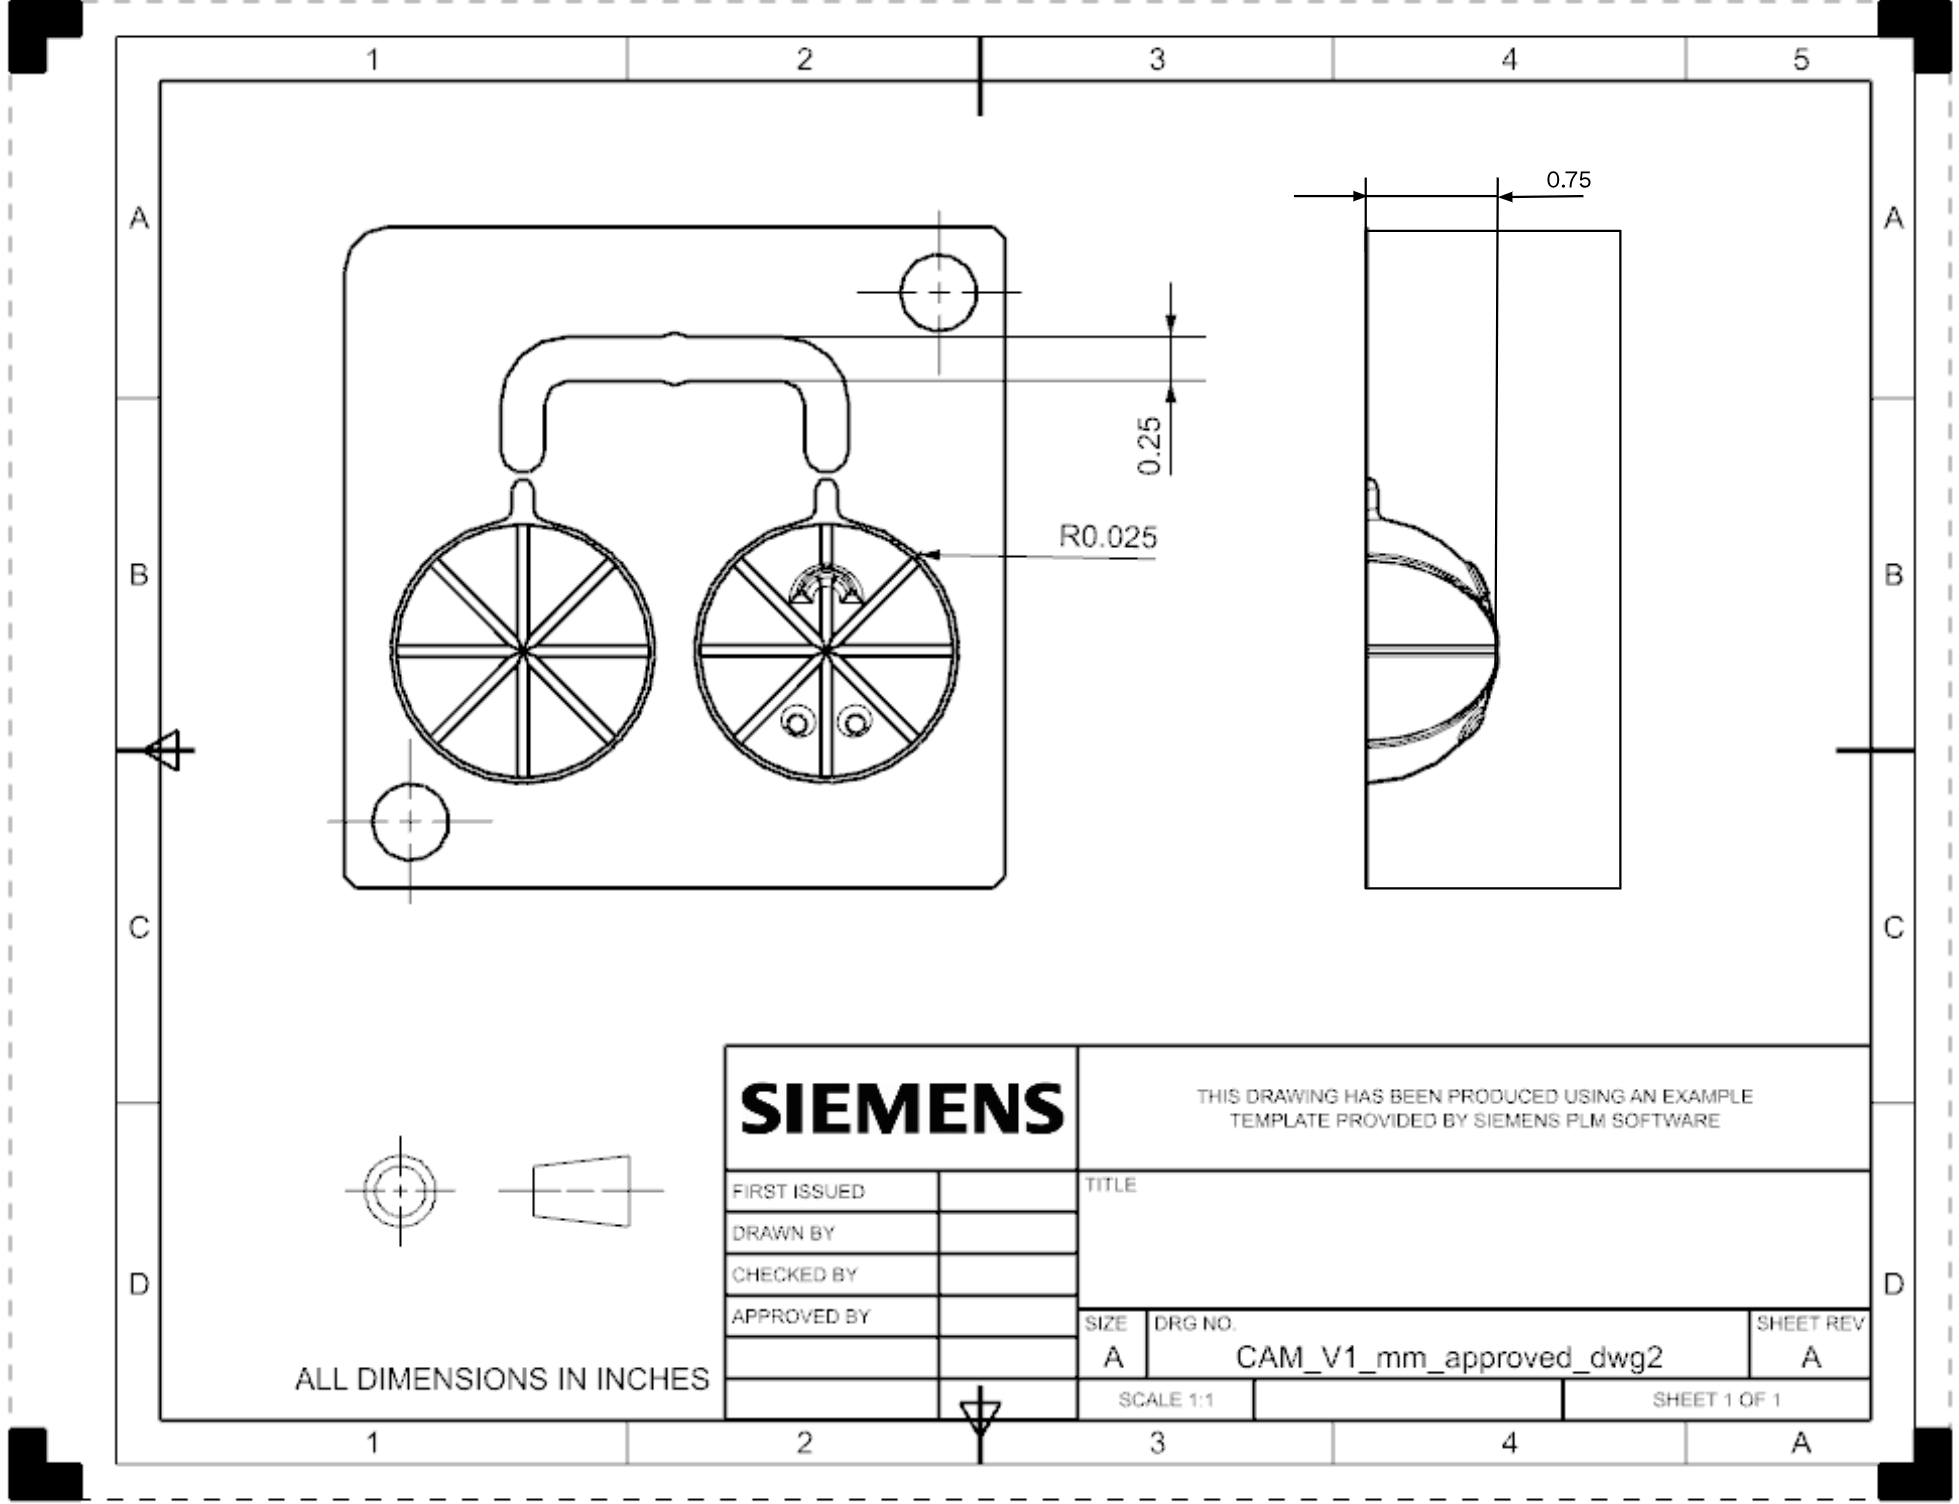
Basketball front half part drawing

Basketball back half part drawing

Snowboard part drawing
To reduce and optimize molds, we decided to put both halves of the basketball on the same mold, equidistant and symmetrical to the sprue. The basketball face was ensured to be vertical to eliminate undercuts and make removal easy. The snowboard mold was trivial- a shallow cavity against a flat surface.
Basketball mold cavity part drawing

Basketball mold core part drawing

Snowboard mold cavity part drawing

Snowboard mold core part drawing
Having designed the molds in NX, we were able to design a CAM program to machine the molds on a HAAS CNC mill out of aluminum blanks. While there was a fair amount of troubleshooting, we successfully machined the two cores and cavities for the basketball and snowboard.

CNC milled basketball mold core

Basketball mold cavity

Snowboard mold core

Snowboard mold cavity
With our mold sets complete, we ran a production run of 10 units of Ball Boy. Following best practices, we ran a metrology study, measuring the basketball wall thickness and the thickest part of the snowboard. Given the issues in mold manufacturing that we ran into, as well as the fact that we manually operating the injection molding machine, it wasn't a surprise that our process was not in control. But we're happy with the detail of the basketball grooves and face, and that parts separated from tooling smoothly!

10 unit production run of Ball Boy